So how does the ShareRoller work on a Brompton?
Simple, we just need to create a mount that replicates the triangular mounting block from the share bikes and positions it in the right place. As in most bikes, the easiest place to attach this mount on a Brompton is to the bolt for the front brake assembly.
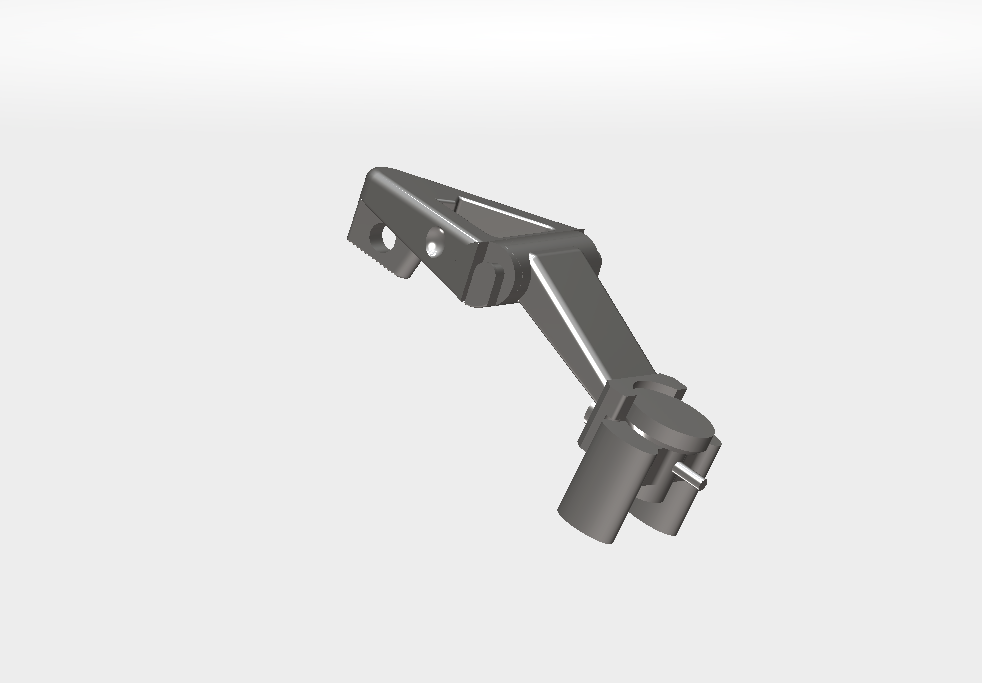
So we have the ShareRoller, and we have a (crude) model of the top of the front fork and brake bolt assembly for the Brompton. They just need to be connected!
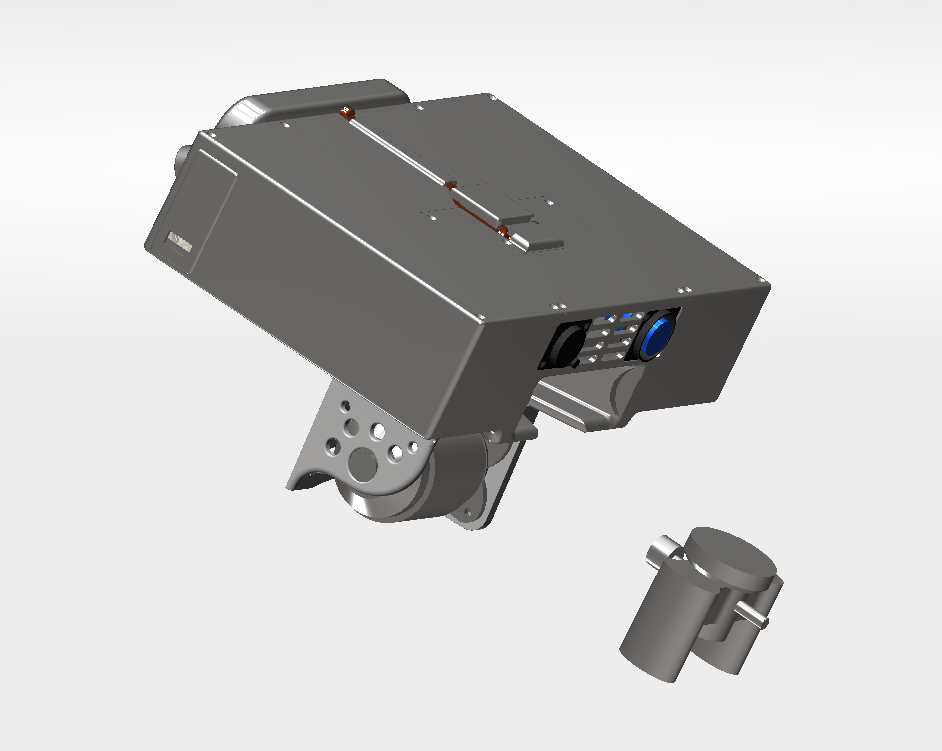
So we create a mount that replicates the share bike docking triangle, positions it in the right place above the front wheel (not shown), and attaches to the Brompton front brake bolt (replacing a washer/spacer that is there now):
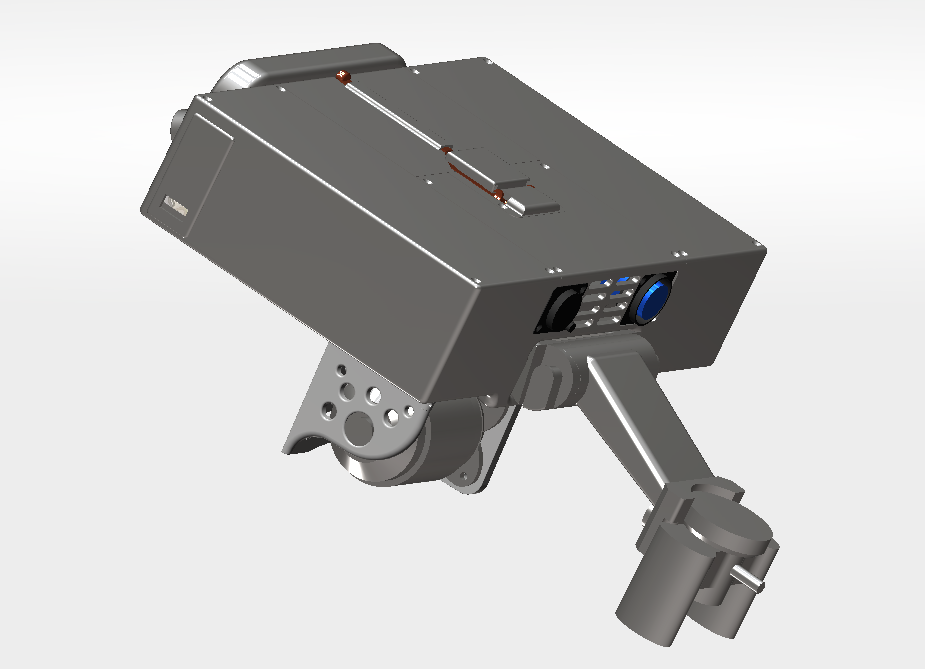
And, voila, we have a ShareRoller mounted onto a Brompton in just the right position (sorry we didn’t go to the trouble to model the Brompton front wheel…)
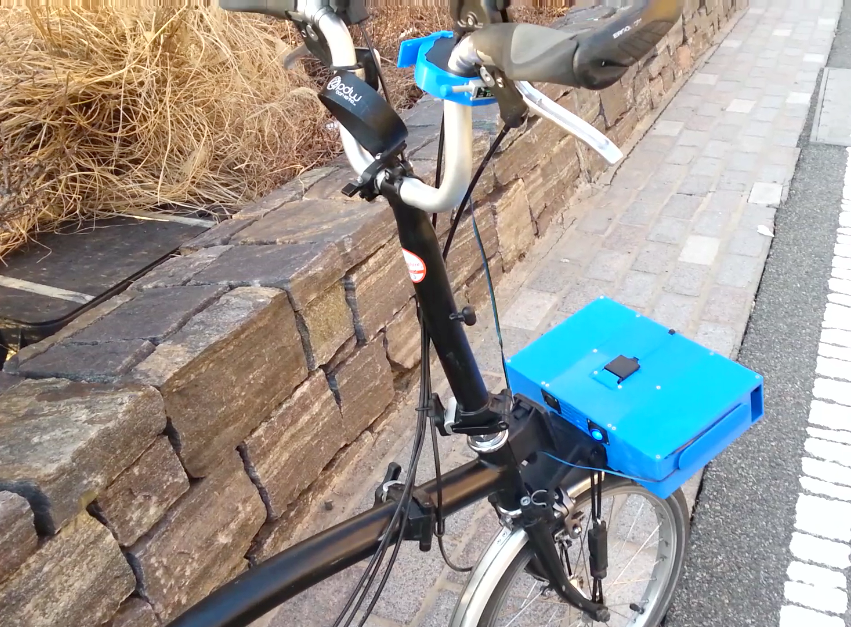
We 3D print this in ABS plastic (very strong!) and install it on the bike. There’s also a handlebar-mounted 3D-printed plastic adaptor mount (in black) that allows the ShareRoller throttle assembly (in blue) to clip onto the Brompton handlebar just like it clips on a share bike handlebar, placing the variable throttle button right at thumb’s reach.
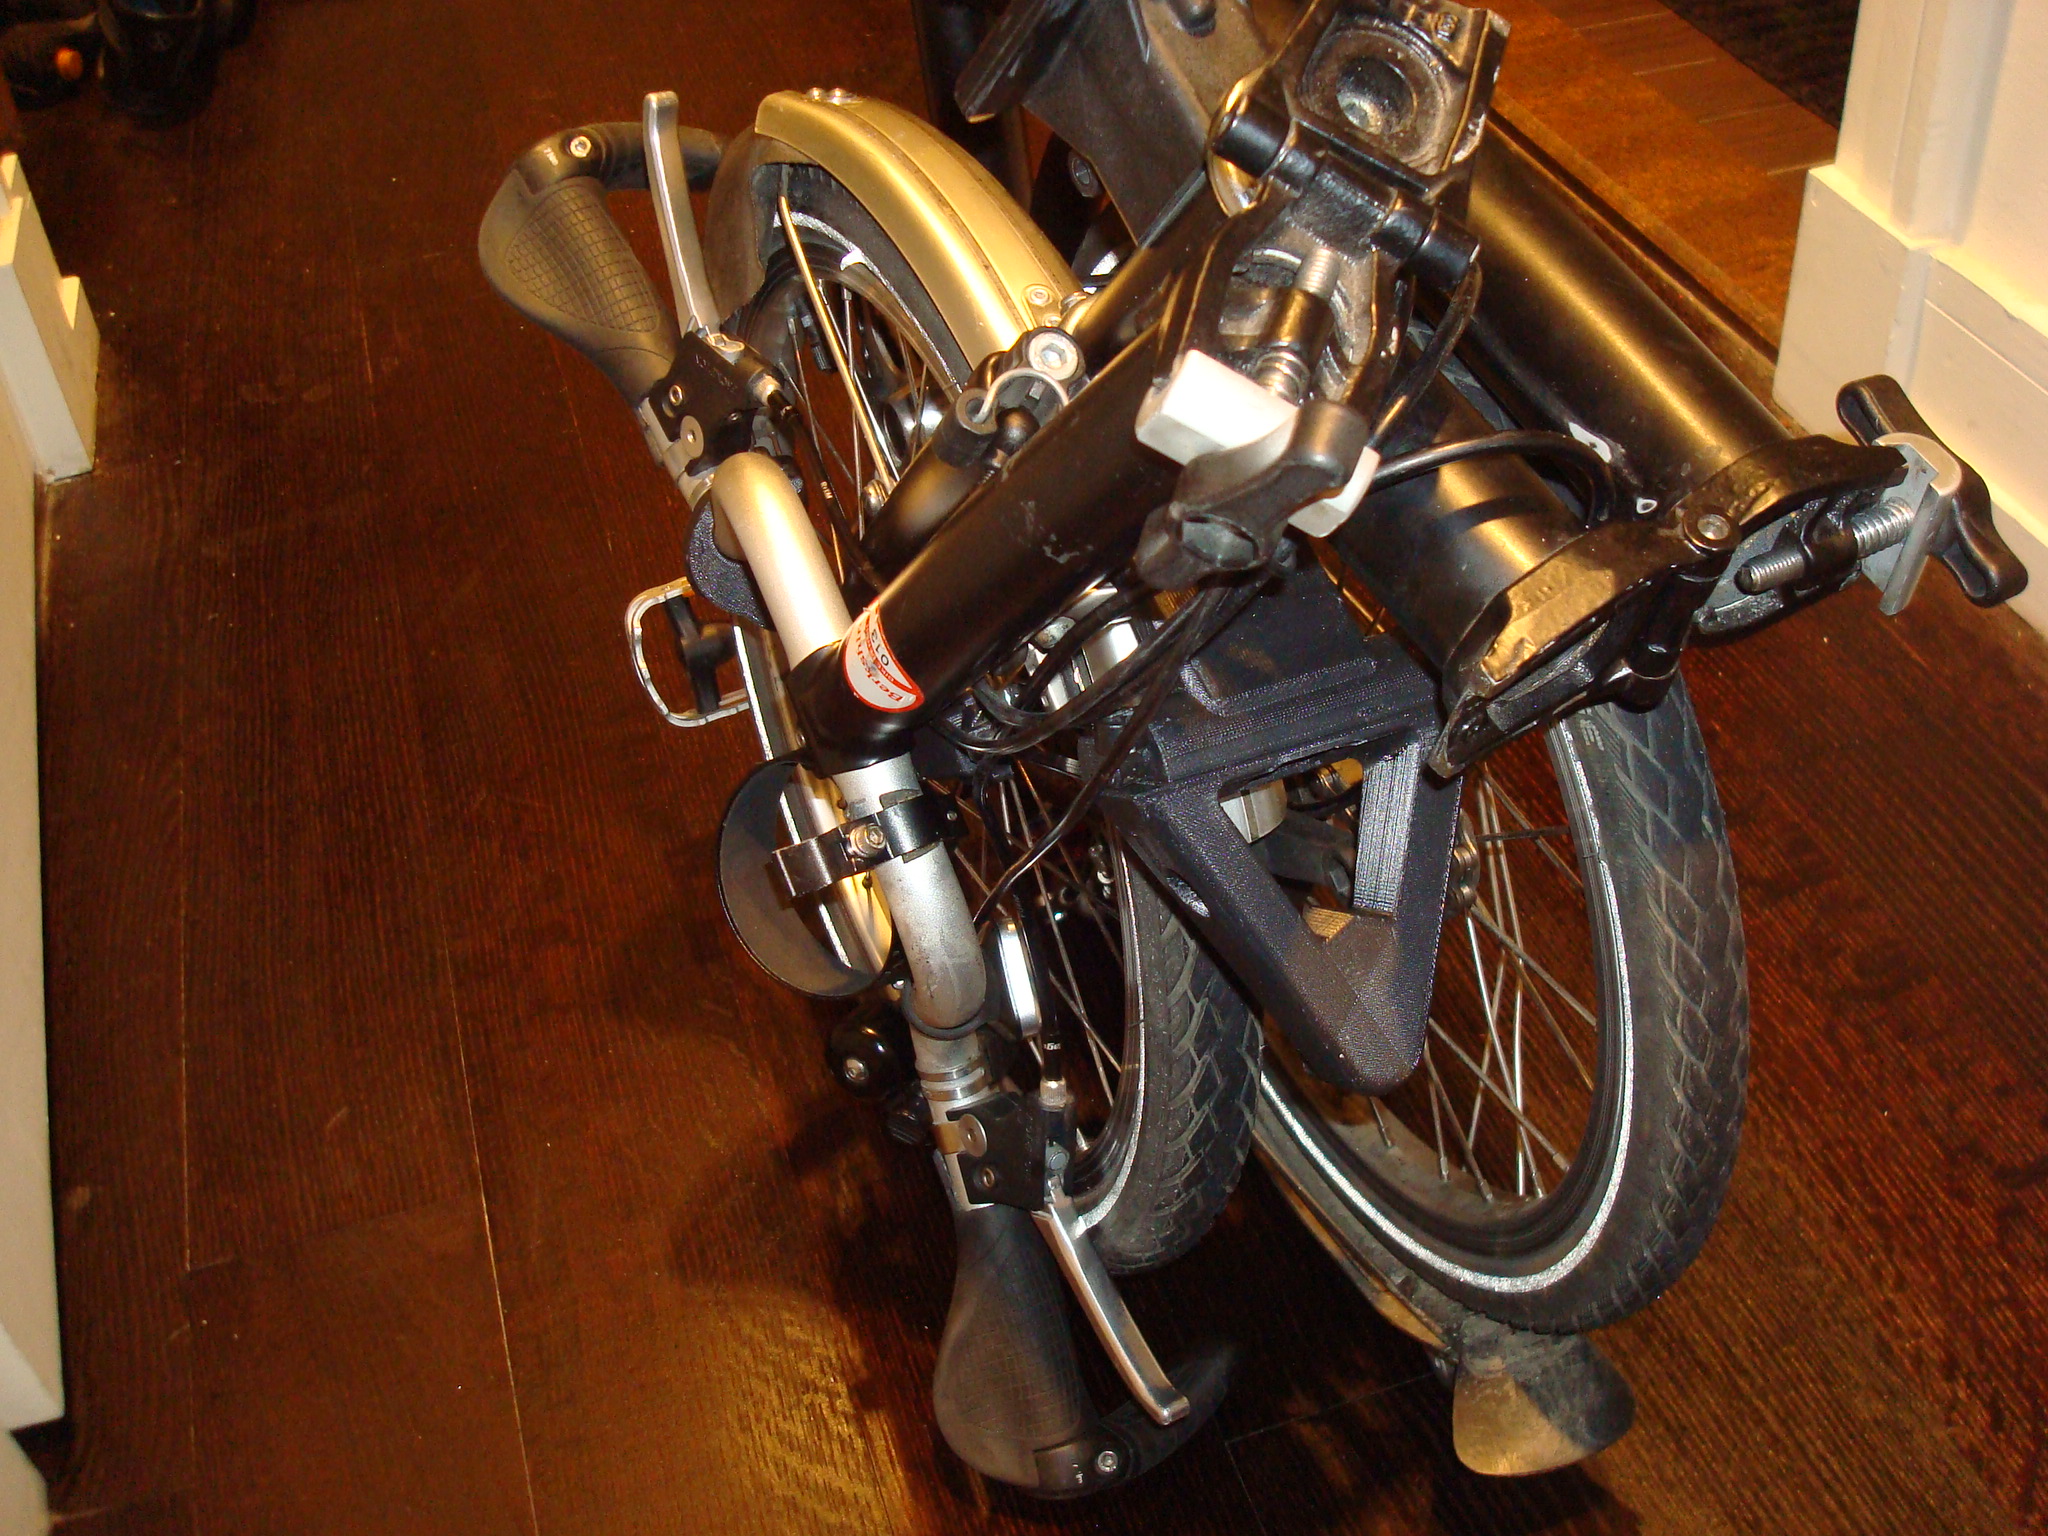
Here’s a close-up of how the ShareRoller attaches to the mount in just the right place to position the motor on the front wheel:
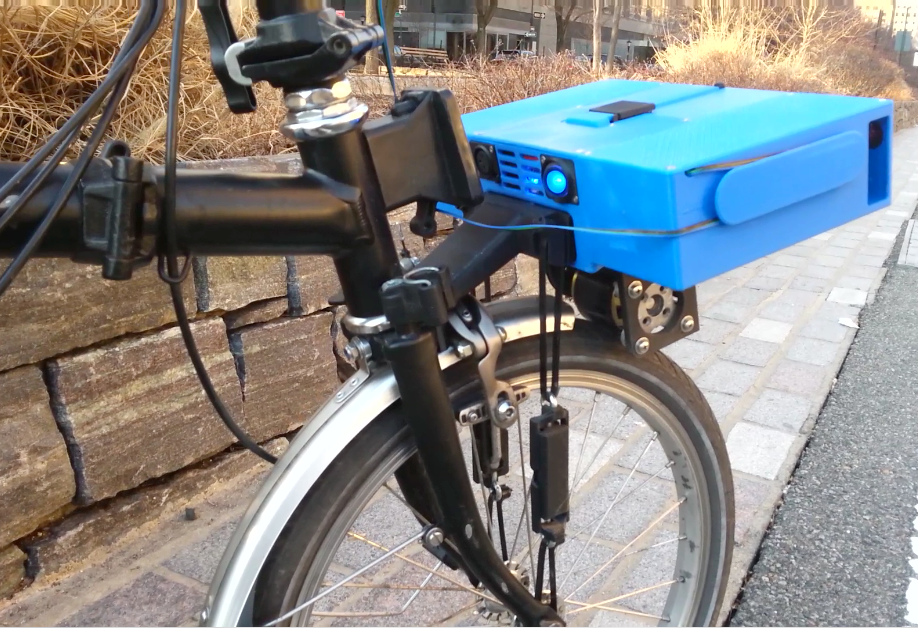
You can also see here the one other key element – the adjustable tension cable assemblies – these attach to the docking triangle mount on one end, and to the Brompton front fork dropouts on the other. Each assembly is made from two steel-reinforced cable ties and one 3D printed plastic encased turnbuckle. This allows the tension to be easily adjusted with a simple twist of the turnbuckle, and the 3D printed encasement not only makes it look pretty, but prevents the turnbuckle from loosening on its own. It’s not as elegant as we’d like, but it works perfectly, and is lightweight and reliable. It allows you to adjust the pressure of the motor on the tire for wet vs dry conditions, and to set it to the right level when first installing the assembly.
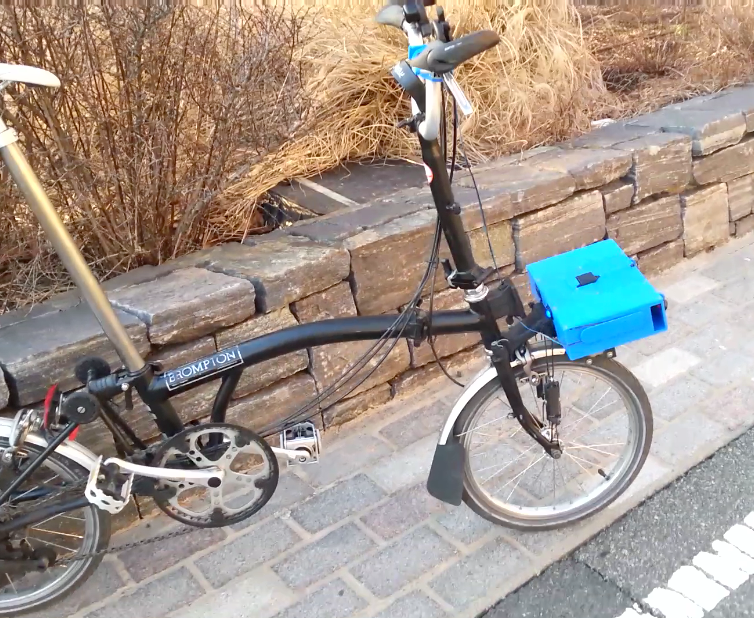
And here’s a picture of the whole thing from a distance (it looks much bigger than it actually is in the close-up shots).
You may have noticed that the ShareRoller might interfere with using the front luggage block. And it does. By about 1/2 inch. Which is why we’ve created an adapter block that mounts to the luggage block, and positions your front basket/bag just high enough to clear the ShareRoller, but well clear of the handlebars. We’ll upload pictures of this in use shortly.
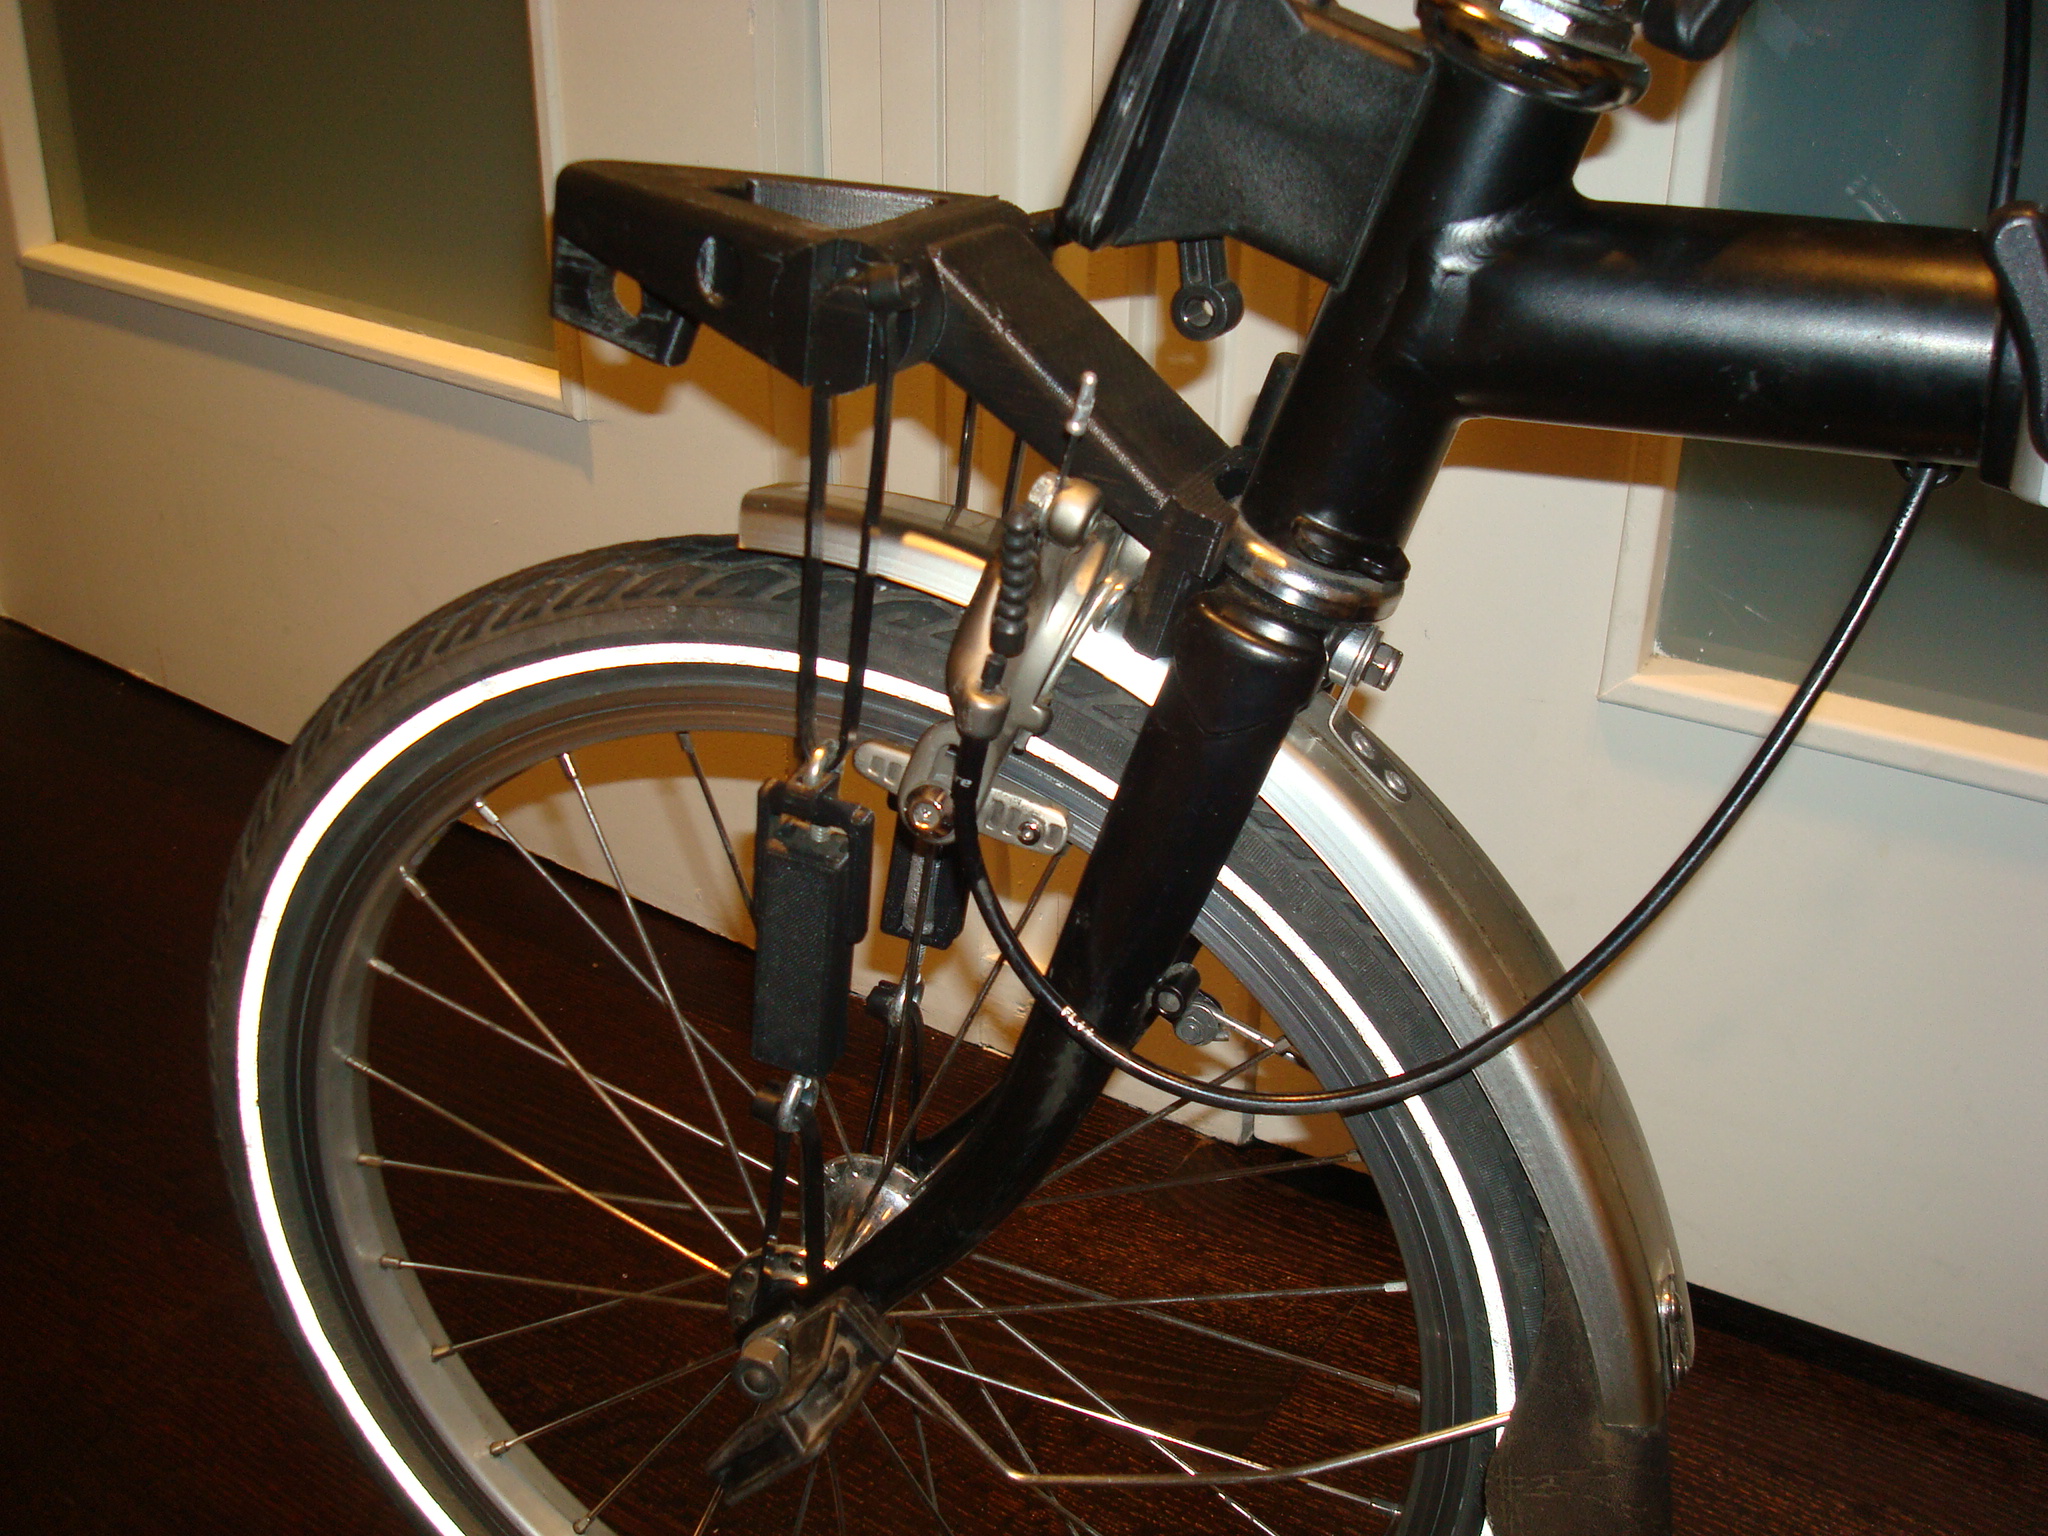
So how does the bike look when you remove the ShareRoller (in < 10 seconds)? Well the mounting triangle and cable assemblies remain. But they don’t really get in the way of anything and weigh ~ 8 ounces (0.2 kg).
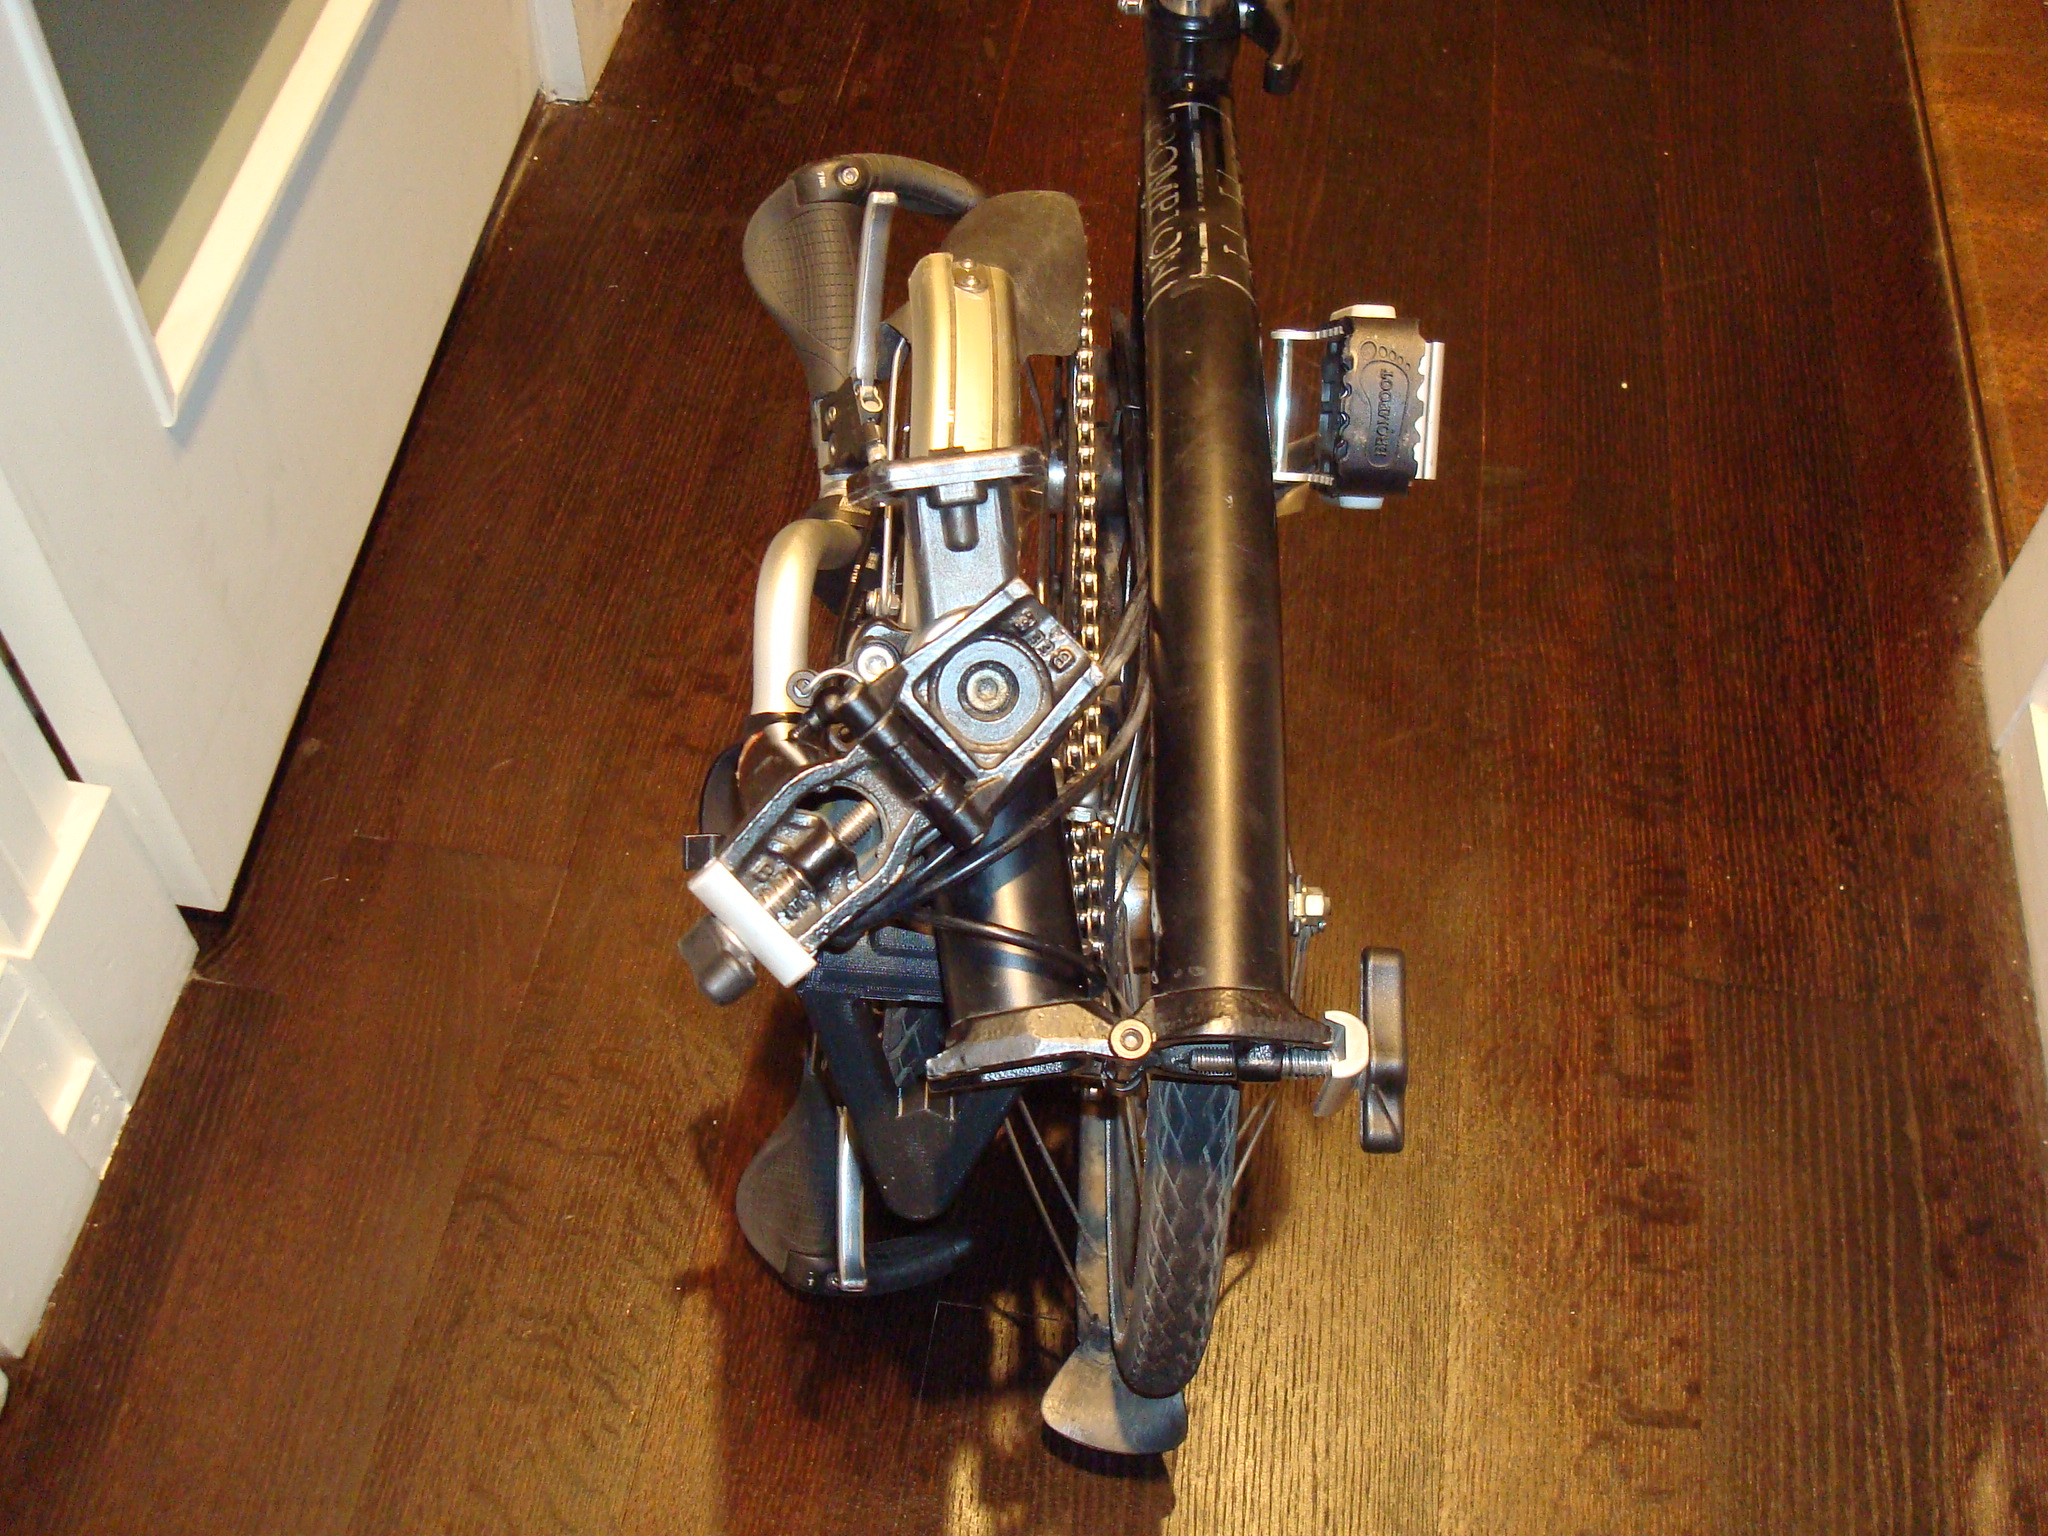
And they don’t impede the fold:
So that’s it. It takes about 10 minutes to install the mounting bracket assembly the first time, and after that it’s less than 10 seconds every time to install or remove the ShareRoller from your Brompton.
We will be selling the entire Brompton mounting assembly for $95 as soon as the Kickstarter finishes (or maybe we’ll add it in as another reward level depending on interest). And it will be refined even further than it is here. Rest assured that the production versions will be bulletproof. And, if we get enough volume, we can make it with injection molding instead of 3D printed ABS plastic (expensive!), and the price will drop to around $30. We’d love to be able to do that.